Apple

2013: New Laptop and Storage Arrays

I apologize I haven't posted in some time....the second half of 2012 was pretty bad.  I will post on that at some point.  Anyway, 2013 is a new year...with new toys! I had been using a 2008 15" Macbook Pro for all of my photo work.  Unfortunately, the apt I was living in caught on fire and that computer got soaked from firefighter water.  I will post more on that later but I have to say that firefighters are prob my fav people in the world now.  Anyway, thankfully I had good insurance and got to get new laptop.  For a replacement, I picked up a 15" Macbook Pro Retina (2.7/16gb/7XX GB SSD).  I was going to get the 2.6 because I read that the performance improvement wasn't that great, but I needed a computer one weekend to finish two photo jobs I was working on.  Apple had the config I ended up purchasing in stock but not the 2.6.  So this one won out.

Initial impressions: this think rocks.  Screen is crisp like nothing you've ever seen.  Needless to say, my photo collection looks awesome, but even little things like the text on gmail you notice.  It's very thin, a little heavier than you'd expect, and fast as hell.  I picked up Lightroom 4 for a song during Amazon's black friday sale and it loads really quickly.  Scrolling is a breeze.  External editing with Photoshop and Nik plugin's is SO much faster than my old setup it's not funny.  I've had too much school work to do lately to use this laptop that much (I've got a 2009 13" MBP I use for that), but I'm looking forward to this guy becoming my daily driver.

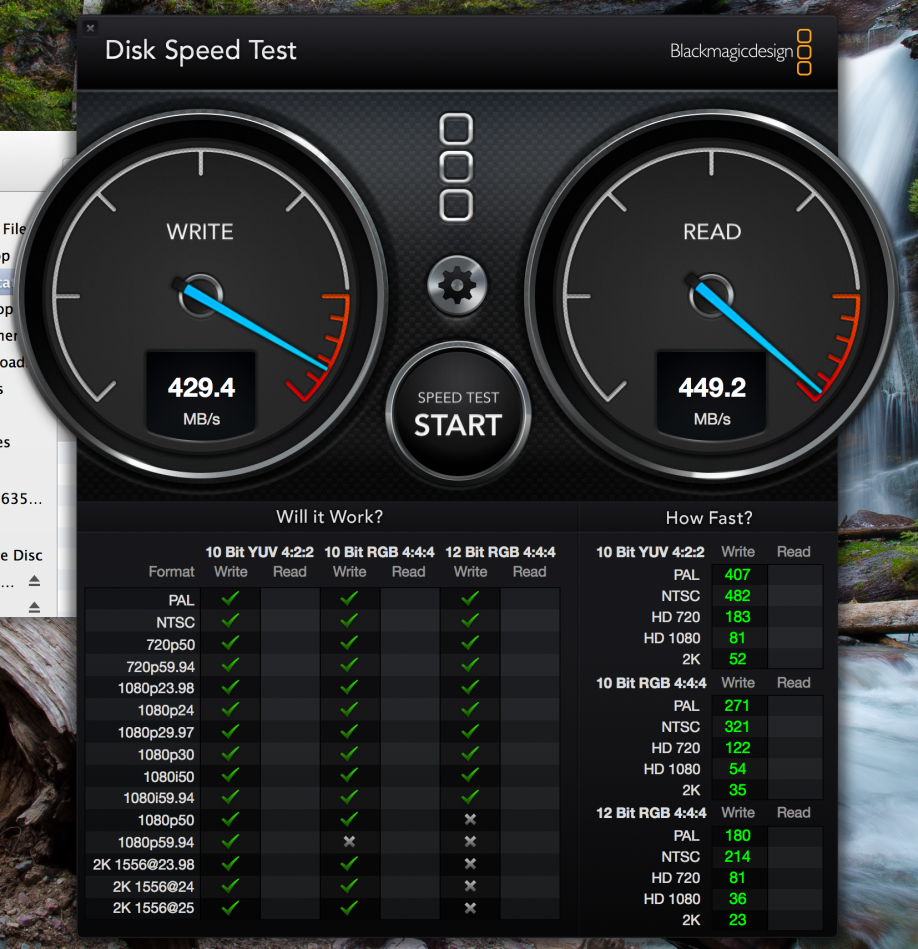
Blackmagic test on internal SSD

Above you can see the Blackmagic test on the internal SSD.  Purty speedy.  It's not a scientific test but just gives you an idea re: read/write speed.  I do science for a living so no scientific tests here.

After the fire I also thought it was a good idea to revamp my backup situation.  I have a valuable (to me) photo catalog that also has client photos in there, countless hours of PhD thesis work, and all sorts of other stuff I'd rather not lose.  I originally thought about Drobo but have read some bad things (not about the company, but rather their products).  I decided to go with RAID arrays over piles of other hard drives.  After some research, I went with a Promise Pegasus R4 Thunderbolt array and a Sans Digital eSATA/USB3.0 box with WD Red Drives.  I've got everything plugged into an APC BR1500G UPS for power management.

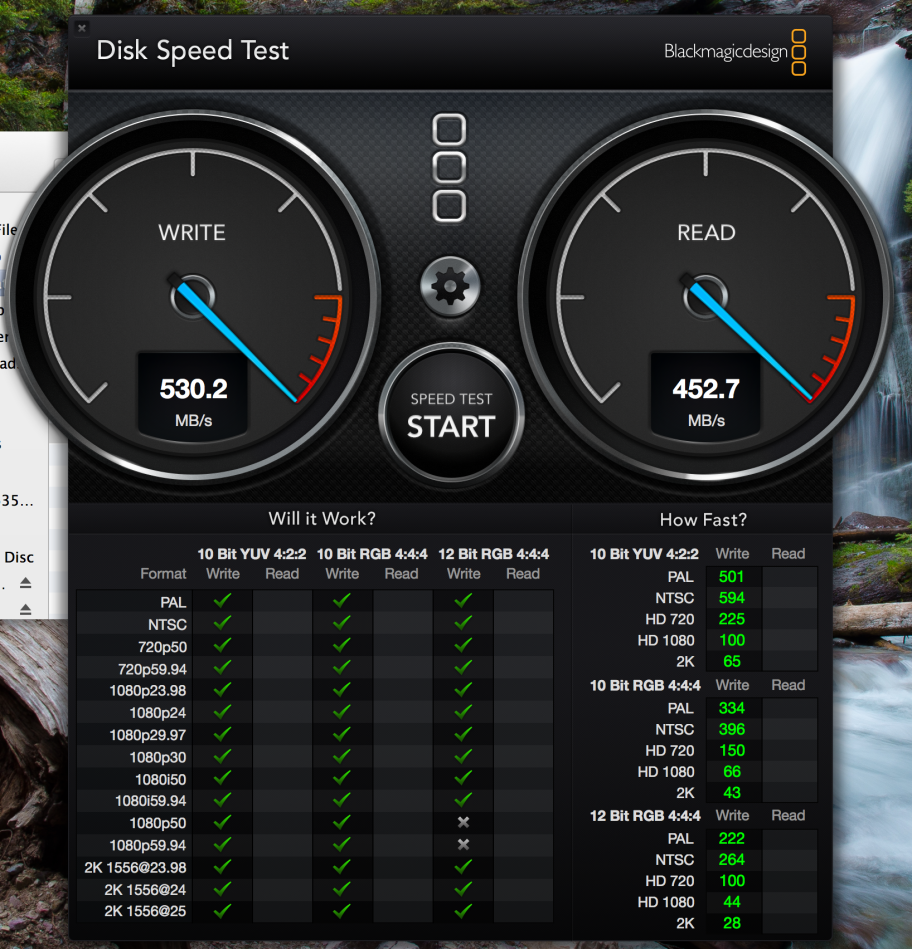
I was a little hesitant about the Promise because of the negative reviews on the Apple store website but went for it anyway.  I just went with the 4TB R4 (4-bay) unit that comes with 4-1TB drives preconfigured in a RAID 5 configuration.  First thing I noticed...instructions say it takes 8-10 hours to synchronize when you first plug it in.  After I disabled all the energy saver settings and told the computer not to turn the hard drives to sleep, I estimated it took ~36 hours for it to synchronize.  A little longer than they said but hey it finished.  First file I transferred was a 33 GB movie file...took about 1 minute to go from internal SSD to Pegasus!!!  Performance tends to fluctuate a little but I see speeds as advertised (below).   More long term testing to come.  I'm planning to no longer store my photo library/catalog locally and run it from this puppy.  Should make edits a breeze.  Also, if you purchase this through the Apple Education store it's cheaper (~$100 off).

Promise Pegasus Results...I see the advertised 500MB/s

So that's the Pegasus.  The RAID 5 setup should allow 1-drive failure and I can rebuild and not lose data.  Knock on wood....

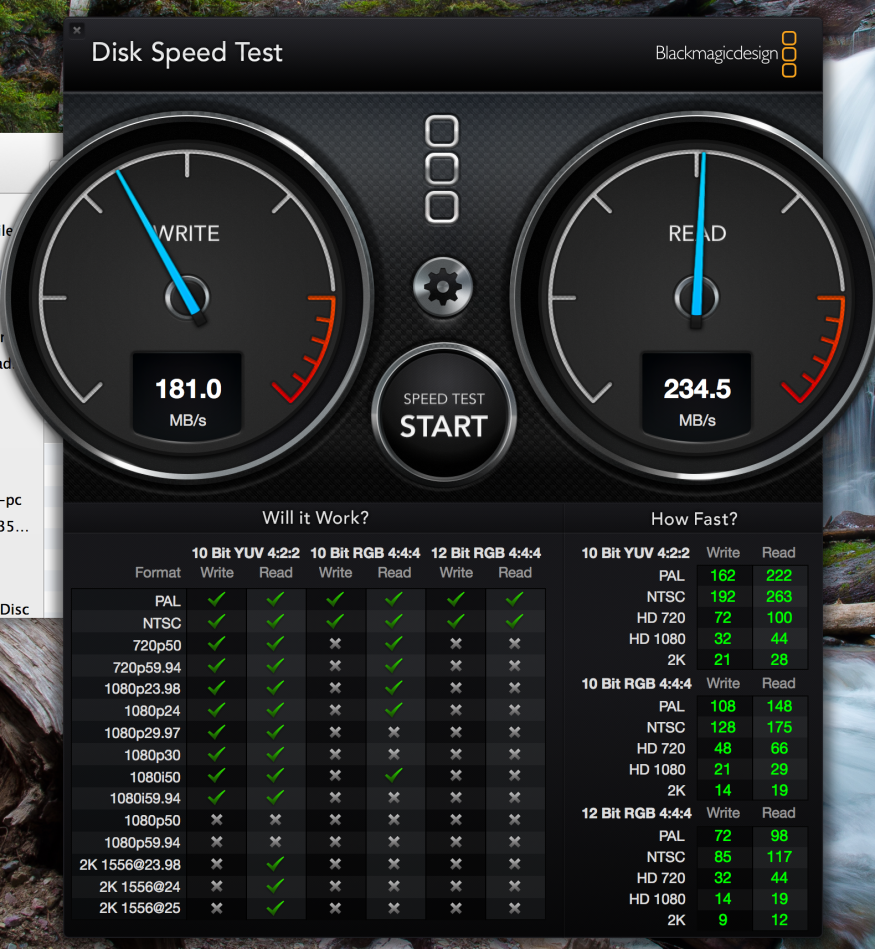
I also wanted ANOTHER backup system.  I put this one together myself.  Ended up with Sans Digital box above (hardware RAID eSATA/USB3.0).  Ideally, enterprise-level drives should be used for an array like this (WD RE, Seagate Constellation, etc).  These drives are super expensive.  I went with the middle of the road.  WD Red drives are still considered consumer drives, but have some firmware modifications that make them better for NAS 24/7 applications.  I'm not planning to run this as a NAS, rather a local storage unit.  Also, this unit will only be for backup and won't be running all the time.  These drives should be ok.  They are 2TB drives (4x2TB) setup in a RAID 10 configuration.  Again, I can lose a drive, replace it and rebuild without losing data (in theory..knock on wood).  I'm using this setup via eSATA with a Sonnet Echo Expresscard Pro and a Sonnet Tempo SATA 6Gb Pro ExpressCard/34.  A couple notes...Sans Digital documentation is not great.  For RAID 10, you set the mode dial in the back to the RAID 1 position, and throw in 4 drives.  Then hold the reset button for 5 secs while powering on.  Voila, RAID 10 is now setup, but not terribly intuitive.  I had to email customer support to get this info.  They got back to me in about a business day which is pretty good.  Plugged in everything and it showed up as a single RAID 10 array.  It froze on me once, but I think that was because I had two things plugged into the adaptor which then became unseated.  The eSATA expresscard doesn't lock in which is problematic.  I've read about this unit overheating because there is so much SATA cabling in the back that it blocks the fan, but it's not bad so far.  Another note, sometimes with eSATA and RAID arrays, you wanna make sure your hub/adaptor/whatever supports port multiplication.  I've also read with this kinda thing eSATA is more stable with OSX than USB 3.0.  Food for thought!  Anyway, I'm seeing about 200MB/s ish read/write speeds.  Wish it were higher (esp after using the Pegasus and internal SSD) but still much faster than USB 2.0.  So anyway, this system will mirror the Pegasus system above.  I figure with two different RAID boxes, different RAID configurations, diff interfaces, and drives from diff manufacturers (Pegasus doesn't use WD RED...I believe they are also consumer drives) I should be alright.  I'll periodically throw stuff on individual drives and throw those under lock and key in different physical locations too.  Starting to transfer a bunch of data around and put setups into heavier use, will report back if there are any probs.  Aside from a few hiccups, everything works as advertised so far! (knock on wood)

Blackmagic and Sans Digital (eSATA)

FYI: I purchased the laptop and Promise Pegasus from Apple; Sans Digital/WD Red, Sonnet gear from Newegg, Tiger Direct, and Sonnet; and APC from Amazon.  Had a bit of a snafu with Tiger Direct ordering but the customer service ppl on twitter got my prob resolved quickly and efficiently...quite impressed.  It's also worth noting I am in no way affiliated with any of the above and received no compensation (monetary or otherwise) for this post.  Also, special thanks to the folks at reduser.net for posting some great info on storage.  Cheers....

Fixing Computers

Turns out when you have to manage and maintain several personal computers for yourself, and you don't have the money to pay other people to fix them, you learn a little bit about hardware and DIY fixing.  Last week I had an adventure fixing a coworkers computer.  Along the way I hit quite a few snags that I thought I'd share in case you ever come across them yourself.  My coworker has a 13" Macbook unibody model A1181, the hard drive of which had crashed.  I took on the task of replacing the hard drive and restoring her computer.  Before I go further, let me say first that this should have been a relatively easy fix....switch out hard drives, install os x, restore from time machine backup.  Unfortunately for me, the "easy fix" turned out to be a tad more complicated.... I got the computer from my coworker and proceeded to take out the hard drive, it came right out.  Unscrewed the drive casing from the old drive, put it on new drive and slid the new drive in.  Here's where the first problem was.  When you install hard drives, you screw in guide screws into the sides of the drive that slot into hard drive guides in the computer.  Normally these are plastic or metal and problem free.  On this particular model, A1181, the guides are rubber that attach to the computer casing with adhesive of some sort.  Well, one of the guides had come loose from the adhesive and bunched up in the casing which prevented the new drive from going in.  It was impossible to get the drive in.  In order to get around this, I had to completely disassemble (instructions here) the computer and thankfully was able to fully access the drive bay that way and get the guide and hard drive back in place.   This was scary because this particular part you can't order, and had this been the problem, I wouldn't have been able to do anything and she would've had to pay apple to do it.  Just buy applecare and the genius' can take care of parts for you, free of charge.

Now that the new hard drive was in place thanks to my disassembly, I reassembled the computer and went to install OS X.  My coworker did not have her restore disks....thankfully I have all of mine for all of my computers so we used one of mine.  I put the cd in the optical drive and here's where we run into our next problem.  The optical drive doesn't work.  If you ever fix someone else's computer, have them be up front with everything wrong with the machine before you start, it will save you time and frustration.  Now we have a problem...how do I get OS X onto the new drive if the optical drive doesn't work??

I tried two relatively idiotic, noob-ish things first.  1) I tried using a disk image of the installer disk and running it from an external.  I made a disk image of the installer disk using Carbon Copy Cloner and transferred it to the external with the back ups. Luckily I had an old drive laying around that I took out of a working mac.  Using a hard drive dock, I plugged this hard drive into the dock, and plugged the dock into the old computer via FW 400.  NOTE: Use FW400/800 or USB, preferably FW.  OS X won't bootfrom eSATA and USB is questionable.  Restarted the old computer and held down option (which will allow you to select the boot OS source) and booted the computer from my hard drive pugged into the dock.  Ran installer from external with back ups.  Does not work.  I think you have to transfer the disk image to a flash drive, then boot from the flash drive, in order for it to work, but I didn't have a spare flash drive.  Maybe I should've booted from the external with the disk image...either way, so far my attempts = fail.

2) I tried restoring the new hard drive to go into the old computer using the Disk Utility's Restore function from the disk image and trick the computer into thinking that the hard drive was the installer disk and that everything would be hunky dory.  Wrong.  Doesn't work.  Ok, back to square one.

Next, the working solution....this is what I would have done from the start had I known the stupid optical drive was caput: plugged new hard drive into hard drive dock that is plugged into a working mac with a working optical drive.  Plugged in external hard drive with time machine backups into working mac.  Inserted OS X restore/installer disk and ran it.  Computer restarted and booted from the optical drive.  Followed the onscreen instructions and installed OSX to the hard drive in the DOCK (remember the names of the hard drive on the working computer, hard drive in the dock, and external hard drive with back up... you don't want to write over the hard drive in the working mac or the hard drive that contains the backups).  After OSX is installed, followed the onscreen instructions and restored from Time Machine backup on external USB hard drive.  Voila, the new hard drive in the dock now has OS X and had been restored to the last time the backup was performed.  Then I just took the hard drive out of the dock, installed it into the old computer, reassembled the old computer, and boom, now we have a restored functional old computer.

I got everything working, but it took about 3 times as long as it should have, and my time is pretty sparse and therefore valuable these days.  In finishing, here are some general tips and tips from my experience worth sharing:

1) buy applecare! it sucks at the time, but we (especially we graduate students) rely on computers so much we have to have a functional one, and you can't put a price on piece of mind

2) save your restore disks that come with the computer!

3) back up your hard drive to external drives!  I use a combination of OS X Time Machine and hard drive cloning with either Super Duper or Carbon Copy Cloner.  There's a lot of back and forth as to what's better, but since external hard drive space is so cheap these days, do both to be safe if you have any doubts.  Think of all the time and effort you put into all the data, documents, pictures, music, etc that is on your computer.  You can't put a price on that.  Extra hard drives and the little bit of extra time it takes to back up are WORTH IT

4) if your hard drive is at or near capacity, clear it out or buy another!  full hard drives run a much larger risk of crashing...

5) periodically, go to Disk Utility check health of disk, repair [if necessary], and repair permissions [for os X]

6) restoring a hard drive with an image of the installer disk and trying to boot from that doesn't work

7) simply trying to run the OS X installer from an image doesn't work....you have to boot from it somehow (i think, there are plenty of tutorials out there)